In Logic Pro 9 adding custom icons was a lot easier. However there is a way to do so. First icons are now multi-layer TIFF files instead of single layer PNGs. Second you will have to dig around inside the Logic Pro X App and do some editing.
Below is a video walk though of how I did it, followed by step by step instructions.
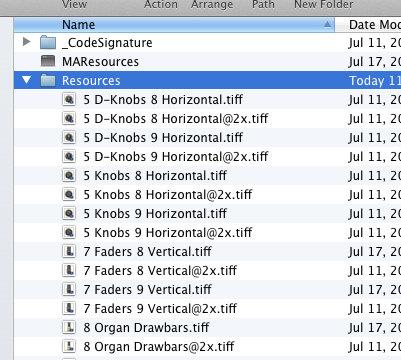
First — Right Click on the Logic Pro X app and click on Show Package Contents and follow this path:
Contents/Frameworks/MAResources.framework/Versions/A/Resources
To add them, you need to do a few things:
1. Make sure you back your application file or at least the MAResourcesMapping.plist file you will be editing. I backed up the whole Resources Folder in the video.
2. Create a TIFF image. It doesn’t have to be a multi-layer TIFF You can convert your old PNGs to TIFFs using preview.
The dimensions of the icons where 128×128 in Logic Pro 9, so that’s what I used here.
3. Open MAResourcesMapping.plist from the Resources folder.
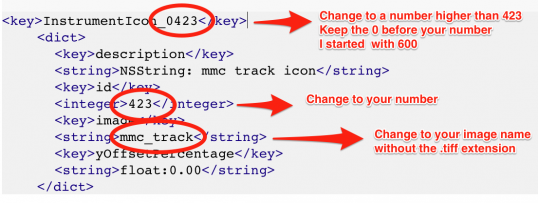
If you scroll down, you’ll see a bunch of strings. Search for this line InstrumentIcon_0423
0423 is the last one in the list.

4. Duplicate (copy and paste) the following code. Once for each image you want to add.

5. Replace the following information for each image your adding.
I started at 0600 to be safe in case they add more icons in an update.

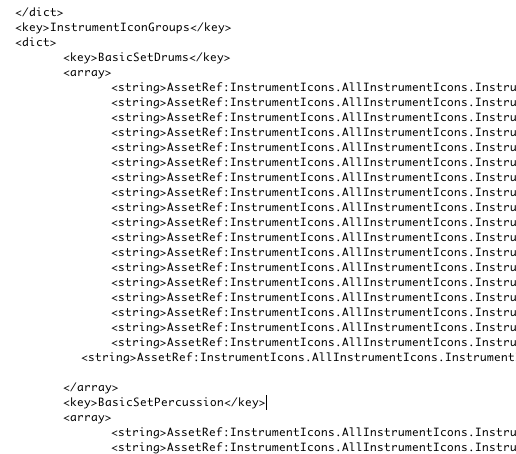
6. Scroll down a bit and you’ll see this code.

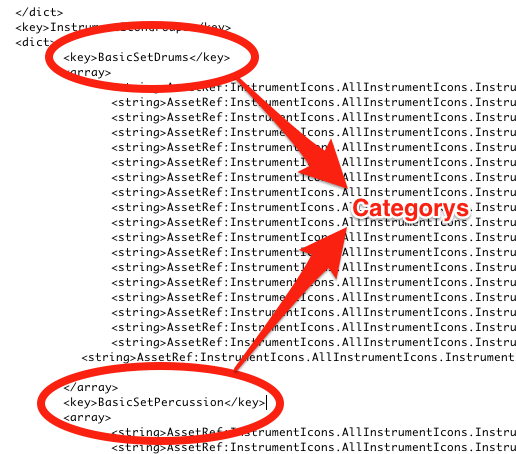
7. Locate the category you want the icon to be in (the code below is for BasicSetDrums & BasicSetPercussion). Duplicate one of the strings, but change the number at the end to your four digit number from above. In my case, using 0600.

8. Save the MAResourcesMapping.plist file.
9. Add Your Image files to the Resources folder.

10. Open Logic Pro X and your new icons will be there. You will need to restart Logic if you had the app open while editing.

Leave any questions in the comments…